This is another of those exercises that seem a little out of place towards the end of a level 5 degree module. Whatever, there’s always something to be gained from a bit of a structured investigation into why we do things we learned ages ago – so here goes.
The detail of the project is that I should take shots of the same scene with and without polarisation at modest telephoto and wide angle focal lengths. I threw in the equivalent of a standard lens for good measure, added a couple of shots to emphasise the caution that needs to be exhibited when using a polariser and then finished with the exercise requirement of a couple of shots of a reflection in water.
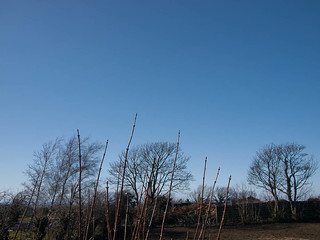
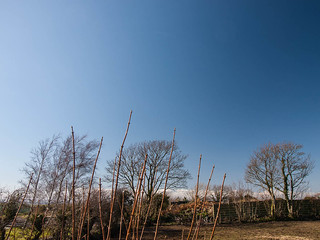
First up – the scenes with and without polariser. The effect of a polarising filter in the circumstance of the shots below is to darken the sky relative to the un-polarised shot. To “maintain” a correct exposure the camera tends to let in more light with the effect that the foreground, which is not affected by the filter, is brightened relative to the sky. To compare like with like as far as possible across these images I have used Lightroom’s “synchronise total exposure “ tool. The shots below clearly show how the foreground has been lifted relative to the sky. The converse of this is that if I had exposed for the foreground in all cases them the sky would have appeared darker in the polarised shots.
Another effect of using the filter is that the white of the clouds is relatively much brighter – which is particularly noticeable in the last shot because they form a larger part of the overall composition. A key feature of these shots is the non-uniformity of the effect on the sky. All the shots were taken at 90 degrees to the direction of the sunlight. In the telephoto shot the polarising effect is relatively uniform – because of the relatively small section of sky included. However, at the wide angle end, there is a distinct darkening in the 90 degree direction, which fades markedly towards the left hand edge – which was closer to the sun. While this is just about acceptable in the mid-range shot, at the widest angle it looks distinctly odd.
Finally the filter has had the effect of cutting through the haze to provide detail in the distant hills – largely I suspect, by removing the impact of scattered light from the intervening atmosphere.
| Focal length (35mm equiv) | Un-polarised | Polarised |
| 28mm | 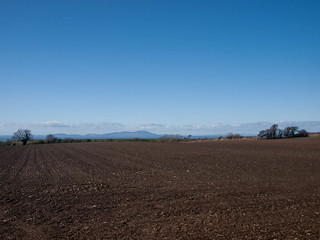 | 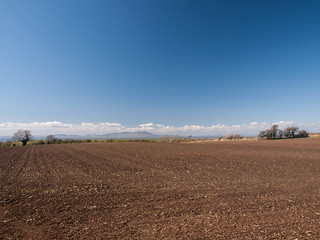 |
| 54mm | 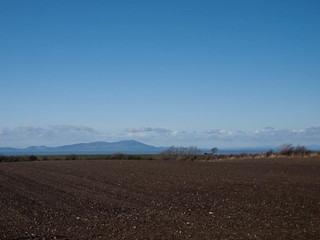 |  |
| 108mm | 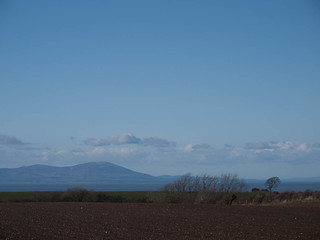 |  |
An even more obvious example of the impact of the angle of shooting relative to the light can be seen in these two taken at roughly 45 degrees to the direction of the sunlight. The polarised shot looks very un-natural with the sky fading from deep blue to almost white across the image.
The final part of the exercise asks for polarised and un-polarised shots of a water surface. In this case the polariser will remove the surface reflections, allowing the viewer to see “into” the water – like this in fact:
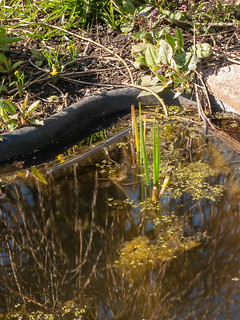
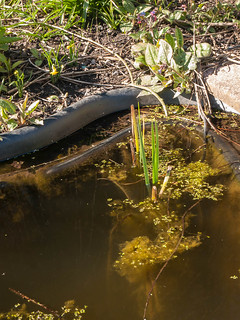
Which you prefer is a creative choice – in this example I prefer the polarised version. A similar effect can be used to remove reflections from windows, provided you are shooting at an angle to the glass, and polarisers are also useful for reducing glare from glass when doing cityscapes – although I have no with/without pairs to show the effect. Finally – they can darken some foliage – again I don’t have any obvious examples – but I’ll try to remember to post one once there’s some foliage to darken.
Conclusion
I use a polarising filter on a regular basis – when the sun is shining. It adds impact to the sky, and used carefully improves the balance between sky and foreground. It also has a useful role in controlling unwanted reflections which I find most useful in cityscapes.
No comments:
Post a Comment