Acquired a near perfect Weston Euromaster V on e-bay the week before last. It’s a wonderful little device with dials and buttons – no digits required apart from my fingers – it doesn’t even need a battery as the selenium cell that measures the light also produces the current needed to make the needle move. Not sure quite how often I’ll use it, but it seemed like a handy thing to have available.
Have just give it its first proper outing in Project 12 which requires me to measure the light in various parts of a scene. I chose this one as the sky on the left was still quite bright and there was a fairly bright highlight on the garage wall and the bottom left of the garage door was in fairly deep shade. I make no claims for it as an image - other than it fits the requirement of the Project.
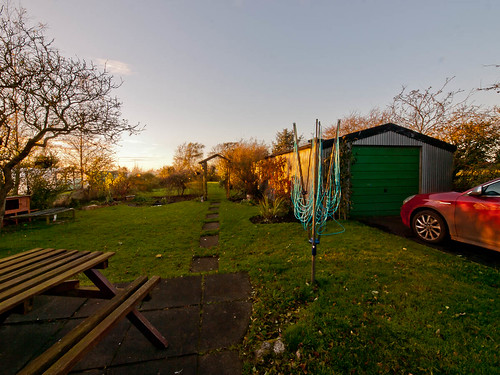
First up the beginners error. I did what the exercise asked – took a reading from the garage highlight (1/60 sec at f22) and from the base of the garage door (2.5 secs) – and then I took a shot with the average exposure (a bit over 1 sec) rather than with the mid-point on the basis that half of (2.5+1/60) was about 1.3 secs. Idiot – I should have course have chosen the stop half way between 1/60 and 2.5 secs – around 1/4-1/6 of a sec – which would have given me a much better exposure – as it was it was off by a mile. Note to self – engage brain before following instructions.
The incident light reading which I took in the patch of sunlight gave a much better exposure (1/4 sec) and using the ‘O’ setting on the light meter as per the instructions gave a similar exposure (this setting lets you measure a highlight and calculates the exposure accordingly) although in both cases the bright patch of sky was burned out beyond reasonable recovery.
Once I’d realised my error I repeated the original approach – this time averaging the meter readings rather than the shutter speeds and got a similar result to the camera on auto – which is reassuring. However – in all these cases I was still losing the highlights in the sky so I tried a final attempt with the highlight metering function and the meter aimed at the brightest part of the sky. This gave me an exposure which allowed me to recover the small burned out area that remained. The foreground was quite dark, but was recoverable in Lightroom to give the result above.
This latter part strays into the second half of the project which looks at dealing with the contrast after the exposure.
I’m not sure I understand the point of the parts of the project that ask me to compare a black and white conversion with the coloured version. I know (although I’ve never tried it) that black and white film has more latitude for contrast than colour film – but in the case of the digital image both were taken from the same sensor. I found the shadows could be recovered on both without too much issue. Even in the coloured version it is possible to tweak the colour sliders to lighten areas such as the grass selectively.
Conclusions
On a digital sensor black and white is essentially no more flexible in contrast terms than colour – but whichever route you take you get a better result if the exposure is within the range of the sensor, and you’ve got the highlights under control.
I have a Weston Master II, they are great units aren't they! Now I have started into using vintage lenses on my DSLRs, it can be very addictive!
ReplyDeleteA II - has it had a new cell as it must be getting on a bit by now. I was surprised at just how easy and obvious it all was - shall certainly be repeating the experience.
Delete